Design Templates
Excelerator Templates are Excel spreadsheets that Excelerator can use to download and save data from Sage.
As well as supplying Standard Templates, Excelerator allows you to design your own templates to fit with your business processes.
Overview
The Designer significantly adds to the overall power of Excelerator by allowing you to create your own templates. This gif shows how quickly a new template can be created for entering Sage NL Journals.
These can be new templates on a blank Excel sheet that you then enter data into, or they can be built over an Excel sheet with existing data.
Ranges
- Excelerator works by taking or putting data into designated areas on a spreadsheet, and these areas are called ranges.
- There is a fixed list of ranges for every Excelerator module.
- Some ranges are mandatory and must be created for Excelerator to work; others are optional.
Header Ranges
Header ranges have one cell and are usually placed on the top of the sheet. There will be only one value per post.
Detail Ranges
Detail ranges have multiple lines of data. For example, Nominal Codes, Credit and Debit ranges. These should be columns of data of the same number of rows.

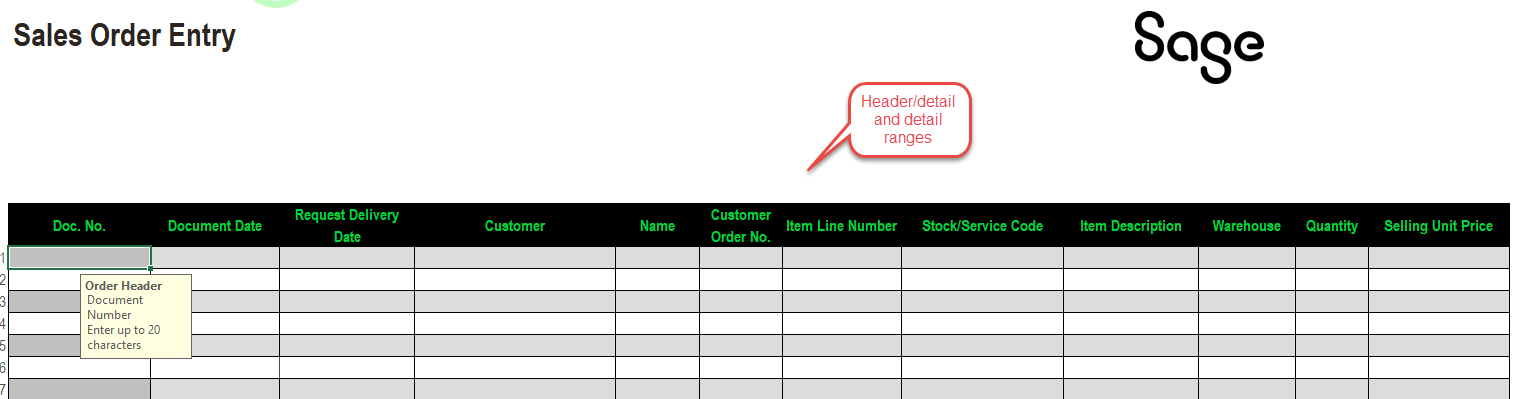
Header/Detail Ranges
Most Excelerators allow multiple items to be saved from a single sheet.
For example, Purchase Invoice Excelerator allows a single sheet to be one or multiple invoices. Very few ranges have to be header ranges because of this.
Ranges such as supplier codes and invoice numbers can be single-cell header ranges or multiple-cell detail ranges in rows.
Most standard templates show this flexibility by having one sheet designed to allow entry of a single item and one to show entry of multiple items.
Read Only Ranges
Some ranges are for data not saved to Sage but returned to the sheet by browses and downloads as information for the user.
Range Sizes
All ranges can only have one column.
Header ranges are one row by definition.
All Detail ranges must have the same number of rows.
Range Format
When adding a range to a spreadsheet, the designer can automatically apply an Excel format to the range. (See Designer Tools And Options).
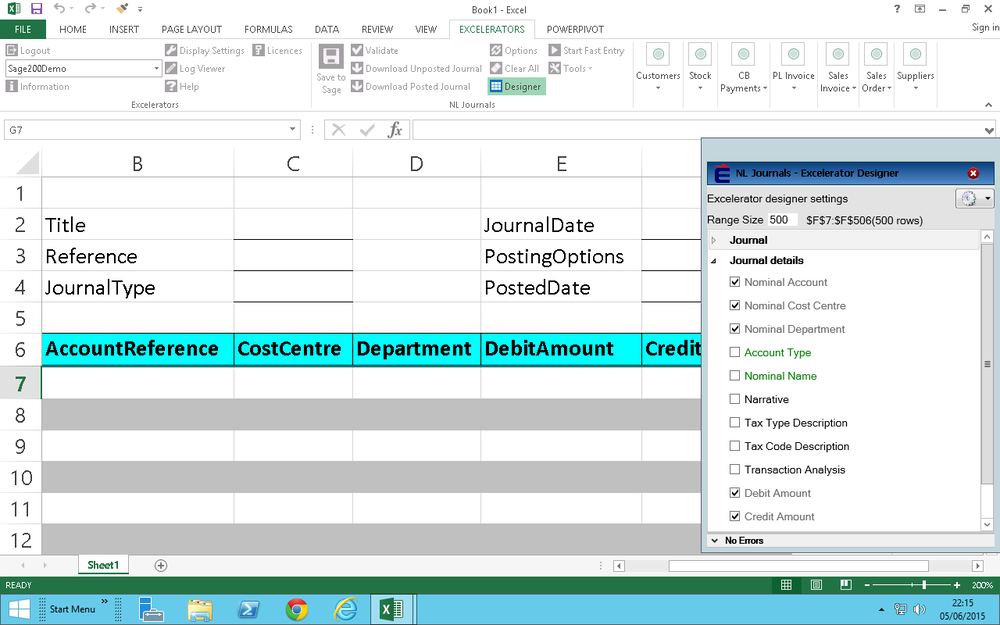
Using the Designer
Open Excel, choose the Excelerator Ribbon for the module in question and select the "Designer" Button. You will see the ranges that can be added to the sheet.
Start by adding the Header Ranges. In the Excel worksheet, click on the cell where you would like the header range to go and then tick the box next to the range name. The range is added to the sheet. By default, a label will be added to the left of the range and a border around it (see Designer Options).
Add other header ranges by repeating the process until you have all the required Ranges for the header.
Next, add the Detail Ranges. These will be in columns of cells.
- Above the field names to the left of the Designer is the Range Size input box. Enter the number of rows required for details on this template.
- Select the cell in the Excel sheet where you would like the ranges to start (Leave space for the column headings!).
- Tick the box next to the range.
Info
Instead of using the Range Size input box, you can select the column of cells on the sheet and tick the range.
Continue adding ranges until the template is complete.
Warning
All Detail Ranges must have the same number of cells.
If a detail range is already added, and you enter a range size that isn't one or the size of the detail ranges already present, you cannot tick any other detail ranges.
The mandatory ranges must be added. These will be highlighted in red and flagged in the Validation Summary Pane until they have all been added to the template.
To delete a range, un-tick the corresponding box in the Designer.
For tools and options within Designer, see Designer Tools And Options.
Info
When designing for a Multi-sheet Excelerator, the range name is linked to the sheet name. View the correct way to Rename a worksheet and Copy a worksheet within Excelerator.
Accessing the Designer Tools and Options Menu
The Designer has several advanced features that can be accessed from the Tools and Options Menu.
The Tools section provides ongoing maintenance to Excelerator Templates and Ranges.
Options control the default behaviour of the ranges. Options can have one of two settings enabled or disabled.
This shows how to access the tools and options:
Top Tips for Using the Designer
Delete ranges using the designer before you delete the columns in Excel. Otherwise, you will create an orphaned range (which can be removed using the Remove Orphaned Ranges tool).
Copy and rename sheets using the Excelerator tools. That way the ranges will be preserved.
Run Remove Orphaned Ranges to tidy up ranges that have got lost.